Post 4: Harbor Container Registry


What is Harbor?
Harbor is a container registry, i.e. a system which manages container images which can then be used by Kubernetes. It is a self-hosted alternative to a cloud based service like Docker Hub.
Why do we want to use Harbor (vs a cloud registry like Docker Hub)?
A few concrete reasons stick out:
- If your cluster restarts (say due to a power outage or hardware failure) then on reboot Kubernetes may try to pull many images at once from the internet, which could clog up your internet connection. Your download speed from a local hard disk is probably faster then your internet connection, especially at home.
- Cloud registries are known to be vectors for malware. Docker Hub integrates with scanning tools to allow you to first pull images, scan them for malware and vulnerabilities, and then choose whether or not to deploy.
- As with any cloud based service, it is subject to change. While Docker Hub is free, it is rate limited, and it could be not free tomorrow.
Installation
Before we can even think about installing Harbor there's a small sized list of dependencies we need to go through (an American small size, that is).
Command line tools
Install imgpkg:
wget https://carvel.dev/install.sh -O install.sh

# Inspect install.sh before running...
sudo bash install.sh
imgpkg version
Install yq:
wget https://github.com/mikefarah/yq/releases/download/${VERSION}/yq_linux_amd64 -O yq && chmod +x yq && sudo mv yq /usr/bin/yqKubernetes Packages
Install cert-manager:
# Get package versions
tanzu package available list cert-manager.community.tanzu.vmware.com
# Install
tanzu package install cert-manager \
   --package-name cert-manager.community.tanzu.vmware.com \
--version ${CERT_MANAGER_PACKAGE_VERSION}Install Contour (note: to install Contour your cluster must have a service LoadBalancer. See post 2 for more info:
# Get package versions
tanzu package available list contour.community.tanzu.vmware.com
# Install
tanzu package install contour \
   --package-name contour.community.tanzu.vmware.com \
--version ${CONTOUR_PACKAGE_VERSION}Harbor
Creating Certificates for Harbor
In order to issue certificates cert-manager is going to use a DNS challenge. This challenge creates temporary DNS records to prove your ownership of your domain to Let's Encrypt. Since this challenge runs each time the certificate renews (every 60 days), cert-manager requires an automatic way to create DNS records for our domain, e.g. by providing cert-manager with an API key or other credentials by which it can access the DNS provider. This will vary a bit depending on the DNS provider for your domain. I'll be covering Cloudflare, see the cert-manager docs for other providers.
On the Cloudflare web dashboard navigate to User Profile → API Tokens → API Tokens. Create an API token with the following settings:
- Permissions:
Zone - DNS - Edit,Zone - Zone - Read - Resources:
Include - All Zones
Next create a Kubernetes secret to store your API token:
cat <<EOF > cloudflare-api-dns-token-secret.yaml
apiVersion: v1
kind: Secret
metadata:
  name: cloudflare-api-dns-token-secret
  namespace: cert-manager
type: Opaque
stringData:
  api-token: YOUR_API_TOKEN
EOF

kubectl apply -f cloudflare-api-dns-token-secret.yamlCreate a ClusterIssuer resource. This will issue certificates.
cat <<EOF > letsencrypt-prod.yaml
apiVersion: cert-manager.io/v1
kind: ClusterIssuer
metadata:
  name: letsencrypt-prod
  namespace: cert-manager
spec:
  acme:
    email: youremail@example.com
    server: https://acme-v02.api.letsencrypt.org/directory
    privateKeySecretRef:
      name: letsencrypt-prod
    solvers:
    - dns01:
        cloudflare:
          apiTokenSecretRef:
            name: cloudflare-api-dns-token-secret
            key: api-token
EOF

kubectl apply -f letsencrypt-prod.yamlFinally create a Certificate resource for Harbor to use:
cat <<EOF > harbor-cert.yaml
apiVersion: cert-manager.io/v1
kind: Certificate
metadata:
  name: harbor-external-cert
  namespace: harbor
  labels:
    app: harbor
spec:
  dnsNames:
  - harbor.private.tcehomelab.com
  issuerRef:
    group: cert-manager.io
    kind: ClusterIssuer
    name: letsencrypt-prod
  secretName: harbor-external-cert-tls
  usages:
  - digital signature
  - key encipherment
If everything went well kubectl get certificates -n harbor should show the following:
kubectl get certificates -n harbor
NAME                   READY   SECRET
harbor-external-cert   True    harbor.private.tcehomelab.com-tls   7m
It may take a few minutes to become ready. You can run kubectl describe certificate -n harbor harbor-external-cert to see Certificate details. If you have waited a few minutes and the certificate is still not ready, follow the troubleshooting steps listed here.
Installing Harbor
We are finally ready to install harbor.
Download the values file and password-generation scripts.
# harbor-values.yaml
wget https://raw.githubusercontent.com/vmware-tanzu/community-edition/main/addons/packages/harbor/2.4.2/bundle/config/values.yaml -O harbor-values.yaml
# generate-passwords.sh
wget https://raw.githubusercontent.com/vmware-tanzu/community-edition/main/addons/packages/harbor/2.4.2/bundle/config/scripts/generate-passwords.sh -O generate-passwords.sh
Run the password generation script on the values file. This will modify the file to include the passwords and keys that Harbor needs.
bash generate-passwords.sh harbor-values.yamlOpen harbor-values.yaml in an editor of your choice. Change the hostname to the FQDN where you plan to host Harbor and should match the DNS name of the Certificate created earlier (in my case harbor.private.tcehomelab.com). Set the tlsCertificateSecretName to harbor-external-cert-tls. Save the file.
Run the following to create a copy of the values file with comments removed (it uses the yq tool we installed earlier):
cp harbor-values.yaml harbor-values-clean.yaml && yq -i eval '... comments=""' harbor-values-clean.yamlInstall harbor:
tanzu package install harbor -p harbor.community.tanzu.vmware.com -v 2.4.2 -f harbor-values-no-comment.yamlFinally, create a Kubernetes ingress resource:
cat <<EOF > harbor-ingress.yaml
apiVersion: networking.k8s.io/v1
kind: Ingress
metadata:
  name: harbor
  labels:
    app: harbor
  namespace: harbor
spec:
  rules:
  - host: harbor.private.tcehomelab.com
    http:
      paths:
      - backend:
          service:
            name: harbor-portal
            port:
              number: 443
        path: "/"
        pathType: ImplementationSpecific
EOF

kubectl apply -f harbor-ingress.yamlIf you run kubectl get ing -n harbor you should see an output similar to the following:
kubectl get ing -n harbor
NAME     CLASS    HOSTS                           ADDRESS          PORTS   AGE
harbor   <none>   harbor.private.tcehomelab.com   192.168.30.212   80      10m
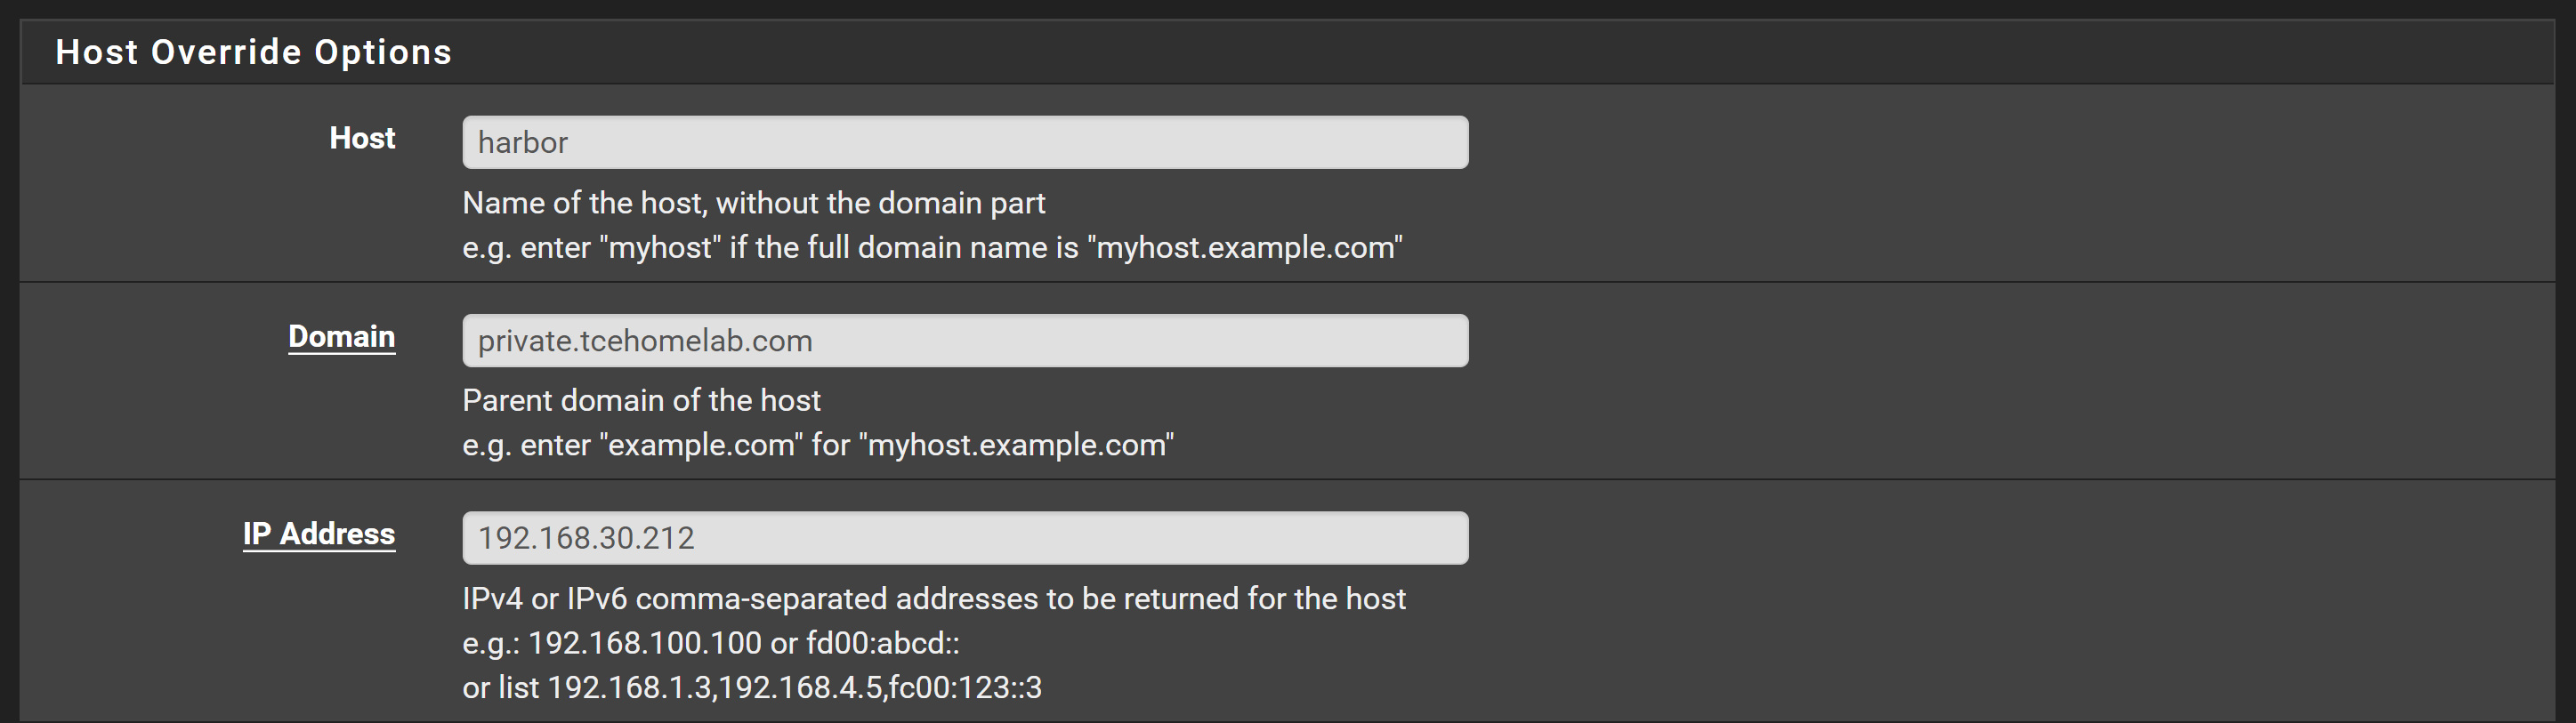
Add a DNS entry on your local network DNS (e.g. pfSense) that points the harbor host to the IP address of the ingress.
Finally you should be able to go the Harbor webpage at whatever your hostname is. You can login with the username admin and password from harbor-values.yaml (harborAdminPassword). See the usage section of the TCE harbor docs or the official Harbor docs for more info, such as instructions for uploading an image to Harbor.