Post 0b: Prerequisite Software


There were a few pieces of software that fell into the category of core infrastructure, i.e. software that will act as a foundation for the other software (including Kubernetes) in the system . This included a log server (a centralized location to collect logs from all over the network), an authentication/LDAP server (which will allow us to have shared usernames and passwords throughout the network), and a certificate authority. As a result, rather than running them as workloads on Kubernetes, they were run as VMs on vSphere.
Note: technically speaking, all of the software in this post is optional, but recommended. You can setup Kubernetes without LDAP and centralized logging.
FreeIPA: a certificate authority and LDAP server
Note: The authors are not entirely happy with FreeIPA and may update this section to use a different LDAP server in the future.
FreeIPA is a piece of software that integrates both a certificate authority and a LDAP server, and also has a convenient web interface to manage it all.
Unfortunately, since it’s developed by Red Hat it only really works on their distros of Linux (such as RHEL, Cent OS, and Fedora). To host FreeIPA, I first created a Fedora Linux VM on vCenter (I used Fedora 36 Server). After connecting to this VM, I followed the steps of “method one” in this article to configure a static IP address for the VM. Once this is done, you should see the static IP address be displayed as the instance IP in vCenter. On the pfSense, I added a DNS record that points to the VM by going to Services → DNS resolver, then adding an entry under “Host Overrides”.
Afterwards I ran the following commands to install FreeIPA:
dnf install freeipa-serverThen, to configure:
ipa-server-install --ca-subject="CN=TCE Homelab Root CA, O=PRIVATE.TCEHOMELAB.COM"Follow the onscreen prompts to configure the installation. The hostname you set for the server should be the one you configured in the DNS resolver of your router.
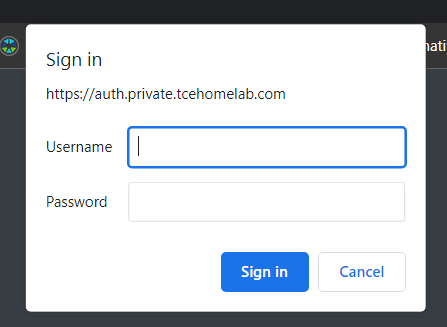
Afterwards, you should be able to go to the domain for the FreeIPA server (in my case auth.private.tcehomelab.com). There you will be greeted with a browser login box. Ignore this box, it doesn’t work. Wait 10-15 seconds for the page to load, then press the cancel button (you may need to press cancel more than once, I usually just spam it). There you will be greeted with the actual login page, where you can enter the credentials you chose during the installation process.

In order to get FreeIPA to play nice with vSphere a number of schema modifications are needed. Follow this blog post to configure FreeIPA for vSphere and add it as an authentication source.
Syslog-ng: core logging server
It should be noted at this time that this is the logging server for the rest of core infrastructure. Eventually, we will set up a much more capable logging stack on Kubernetes. However, if there is a problem with Kubernetes (or for that matter any of our other core infrastructure), then we need a place to look at the logs for it that isn’t on Kubernetes. This is where syslog-ng, which we will be running on the pfSense router, comes into play.
First we will install the syslog-ng plugin on the pfSense by going to System → Package Manager and then clicking on available packages. Afterwards, in the services menu there will be an item called “Syslog-ng” where syslog can be configured.
I created two sources for syslog-ng, one of which will be used to collect the logs from the pfSense, and another that will collect logs from the rest of the network. For the former source, I used the following configuration parameters:
- Interface Selection: loopback
- Default Protocol: TLS
- CA: pfSense CA (this is the one we created in the last post)
- Certificate: pfsense web ui
- Default Port: 5140
- Default Log Directory: /var/syslog-ng
- Default Log File: default.log
- Archive Frequency, compression, and max archives were left at their defaults.
Then, under the advanced tab, I added 3 entries to accept logs over lan:
- a source, called
s_lan, with the following parameters:
{
    network(
        ip("192.168.1.1")
        transport("tls")
        port(1514)
        tls(
            peer-verify(required-trusted)
            key-file('/var/etc/syslog-ng/syslog-ng.key')
            cert-file('/var/etc/syslog-ng/syslog-ng.cert')
            ca-dir('/var/etc/syslog-ng/ca.d')
        )
    );
};- a destination, called
d_lan, with the following parameters:
{ file("/var/syslog-ng/lan.log"); };- and finally a log object called
lanto link the two:
{ source(s_lan); destination(d_lan); };
Finally, follow these steps to add a certificate authority to syslog ng.
We then had to setup ESXi to forward its logs to a remote syslog server.